
What is Rancher 2.0?
For those who may not be familiar with it, Rancher 2.0 is an open-source management platform for Kubernetes. Here’s the relevant bits of their elevator pitch:
Rancher centrally manages multiple Kubernetes clusters. Rancher can provision and manage cloud Kubernetes services like GKE, EKS, and AKS or import existing clusters. Rancher implements centralized authentication (GitHub, AD/LDAP, SAML, etc.) across RKE or cloud Kubernetes services.
Rancher offers an intuitive UI, enabling users to run containers without learning all Kubernetes concepts up-front.
It’s important to know that Rancher enhances, but does not modify, the core concepts of Kubernetes. You can think of Rancher as a sort of abstraction layer, through which you can interface with all of your Kubernetes clusters. If you simply removed Rancher, everything in your clusters would continue merrily along as if nothing had changed (though management of those clusters would become a significant burden).
This post is intended to step you through the basics of Rancher 2.0 use, and assumes that you’ve never seen it before, or are just getting started on it. If you like what you see, feel free to install Rancher onto your own development environment and take it for a spin. In my experience, deploying Rancher in a non-production configuration to an existing cluster takes less than three minutes.
Authentication and Authorization
Like all organizations should, my employer uses a directory service to store user information and centralize access control. We tie that provider, Okta, into Rancher, and use it to authenticate. See my previous blog post for details.

After clicking ‘Log In with adfs’, we are greeted by the Rancher UI.

We are currently in Rancher’s ‘global’ context, meaning that while we have authenticated to Rancher, we haven’t selected any given cluster to operate against.
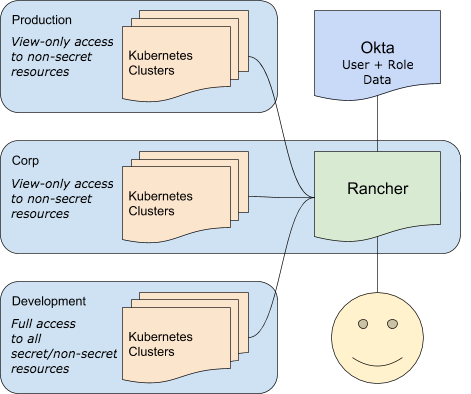
Rancher has a robust role-based access control (RBAC) architecture, which can be used to segment Kubernetes clusters and workloads from each other, and also from human and service accounts. This means that while you might be able to only see one Kubernetes cluster in Rancher, it might be managing another ten away from your view.
At my employer, this means that we can have several clusters, each with very different requirements for security and confidentiality, all under the same Rancher install and configured with the same Identity Provider, Okta.
Interacting With a Cluster
From the Rancher UI’s landing page, we’ll select our ‘inf-dev’ cluster to explore.
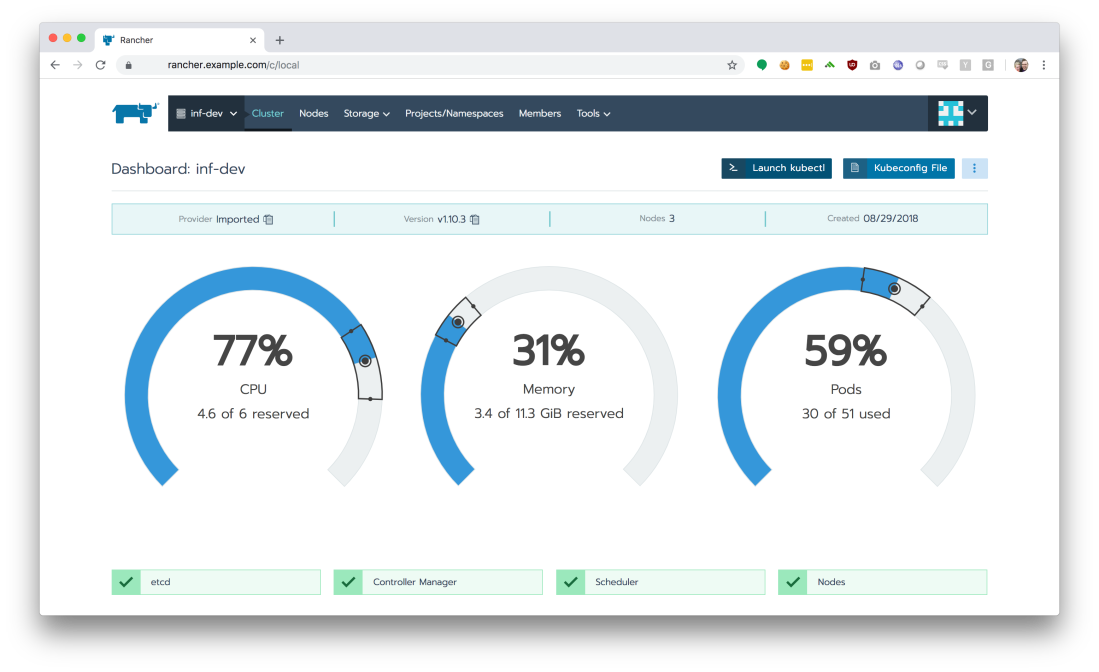
This landing page shows us our worker node utilization and the health of critical internal services, like our container scheduler. The most important thing on this screen, however, is the ‘Launch kubectl’ button on the top-right.
Using kubectl across multiple different Kubernetes environments is a nightmare. It usually requires several config files and changes to an environment variable. When you are running on Amazon’s EKS solution like we are, it gets even more complicated because you also need to be running a properly-configured setup to interact with AWS’ IAM layer.
Gross.
With Rancher, things are much easier. Clicking the ‘Launch kubectl’ button drops you into a Ubuntu 18.04 container, fully-configured with a ready-to-use kubectl installation.
If you’re an advanced user / administrator and still need to use kubectl locally, just click the ‘Kubeconfig File’ button to download a ready-to-use configuration file to your system.
Projects and Namespaces
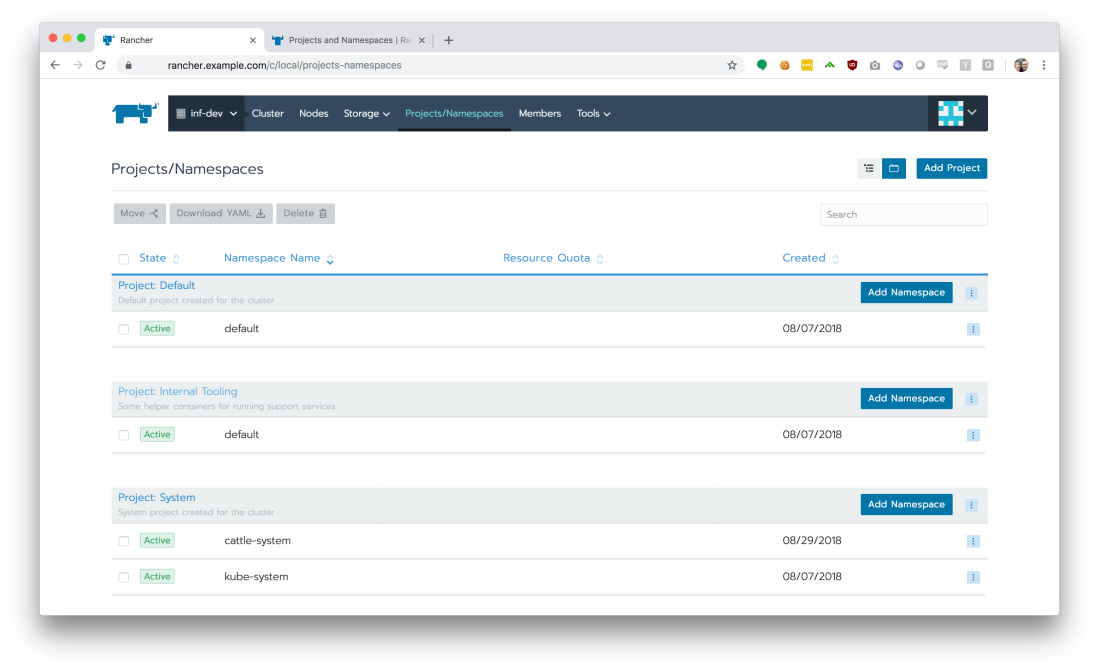
If we click the ‘Projects/Namespaces’ tab, we get a logical breakdown of the services running on our Kubernetes cluster.
Namespaces are a logical separation of resources and virtual networks within a cluster. From the Kubernetes project:
Kubernetes supports multiple virtual clusters backed by the same physical cluster. These virtual clusters are called namespaces.
Rancher also provides the concept of projects, which is a way to group namespaces together and apply RBAC policies to them consistently. For now, our organization does not plan to make use of the projects feature, so the default project, named ‘Default’, is simply a 1:1 mapping to the default namespace.
If we click the ‘Project: default’ link, we can jump into our production cluster’s configured services and see what’s running from inside the ‘Workloads’ view.

Managing Services
Let’s select a service from the Workloads page. For this walk-through, I’ll choose the ‘nats-nats’ service.

We are provided the list of pods running our service, as well as other accordion boxes which can help us understand our service’s configuration, such as its environment variables. Rancher supports granting view-only access to groups as needed, so even in a production environment, we can help non-admins understand how a service is configured. Best of all, because Kubernetes uses a special data type for secrets, Rancher will not disclose the values of secrets to users with view-only permissions, even if those secrets are injected into the container through environment variables.

One of my favorite features of Rancher is the ability to tail logs from stdout/stderr in real-time. While you should absolutely not rely on this for day-to-day log analysis, it can be extremely handy for debugging / playing around with your service in a development cluster in real-time.
If you have admin-level access, Rancher also provides the ability to jump into a shell on any of the running containers, instantly.
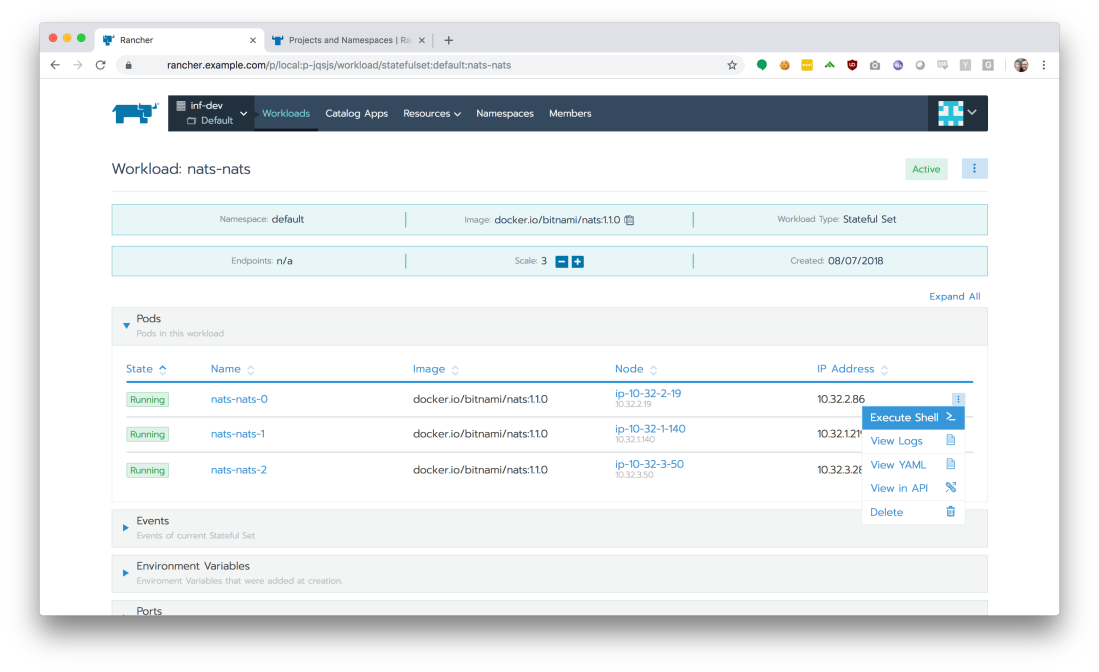

Just like the real-time log tailing, the ability to execute a shell within a running container can be extremely handy for debugging or manipulating your service in a development cluster in real-time.
Managing Ingress
We’ve got our running workloads, but we need to manipulate our Ingress so that traffic can reach our containers. Click the ‘Load Balancing’ tab to view all defined ingress points in our Kubernetes namespaces.
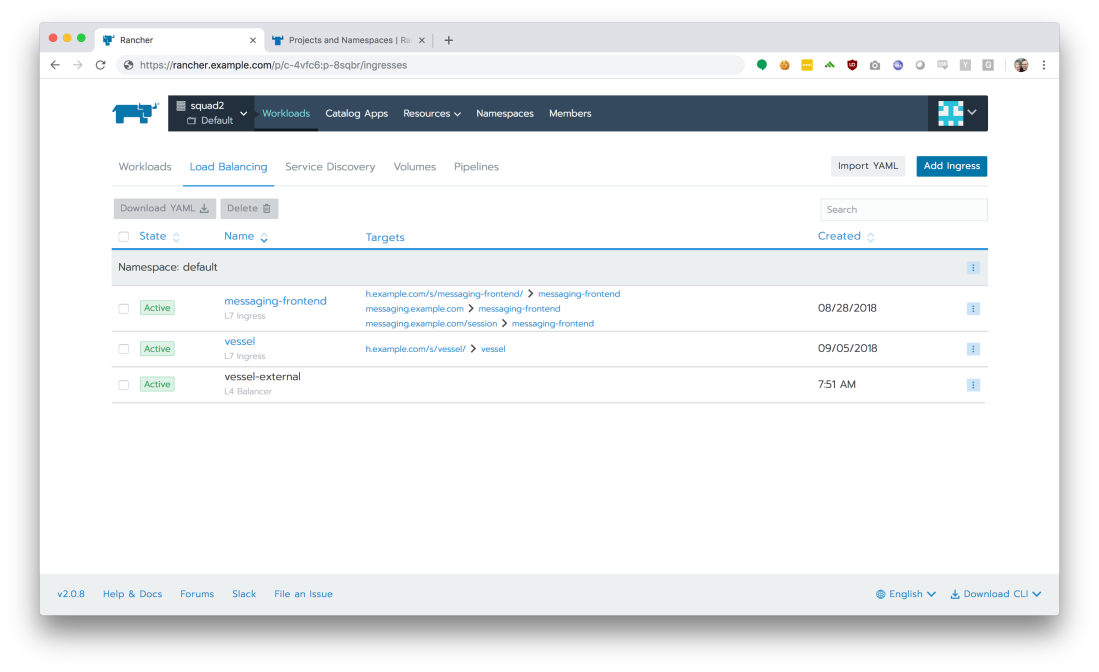
From here, we can quickly see and understand what hostnames are configured, and how traffic will be segmented based on path prefixes in request URLs (“path-based routing”).
With Rancher, adding or modifying these Ingress configurations is quite simple, and is less confusing (and less error-prone) than using the YAML-based configurations required by ‘stock’ Kubernetes.

Take It For A Spin!
Rancher 2.0 helps fill a few remaining gaps in the Kubernetes ecosystem, and makes cluster management a breeze. With both Rancher and Kubernetes development moving forward at breakneck speeds, I can’t wait to see what the future holds for both of these platforms.
That’s all for now, so go install Rancher and get started!

One thought on “An introduction to Rancher 2.0”