Remote access to production infrastructure (death to the VPN!)

Views expressed within this post are entirely my own, and may not reflect the views of my employer, their leadership, or their security staff.

One of the cooler things about how we run infrastructure at my company is our remote access story. It’s basically super super secure magic. I’ve talked to a lot of my security architect peers and auditors in the industry, and as far as I can tell, I think we kind of accidentally invented an innovative way of doing things, through a mixture of commercial solutions and homegrown software. I thought it would be fun to do a technical deep-dive on how the industry operates legacy remote access solutions, versus how we now implement remote access today.

Friends don’t let friends use VPNs

I’m going to start strong with a hot take:
All VPNs are garbage.

VPNs, like all things in computing, can be carefully configured such that if they get hacked, the world doesn’t end. Nobody actually does… but theoretically they could!

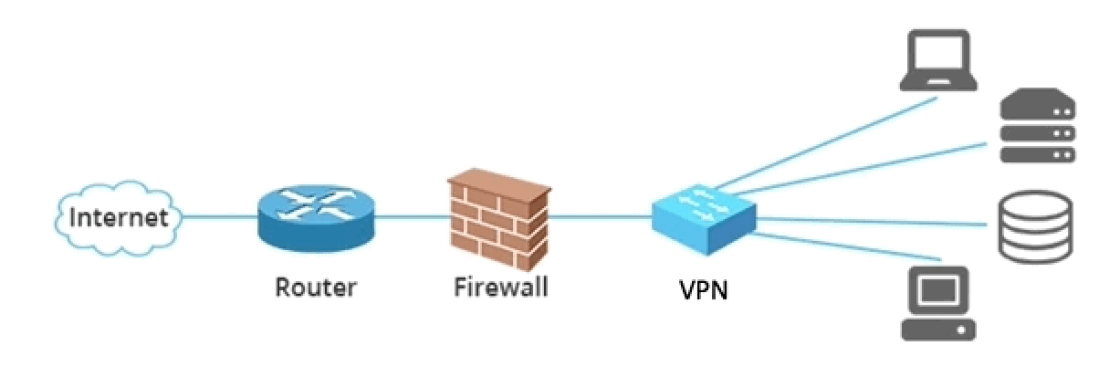
In 99.95% of cases, VPNs are set up to:

  1. Bridge a network device – such as a laptop or even another server
  2. … into a larger network of servers – such as in the cloud or on-prem
  3. … across the Internet – protected with an additional layer of encryption

Screen Shot 2020-03-02 at 2.32.24 PM

This is not a great idea. What if your laptop has malware on it and you VPN into a production network? Tada, you’ve just granted malware local network-level access to your production infrastructure! What do you win? Sadness. Lots of sadness.

Okay, so the malware thing might be a bit contrived. What about a hacker compromising the VPN itself, perhaps through a vulnerability within the VPN device or software, in order to escalate directly into the target network unchecked? Now that’s the ticket, and it’s far from theoretical. For details, feel free to read this write-up about how the Heartbleed vulnerability was used to hijack VPN access, through an attack vector I warned about right here in this blog.

We’ve seen a rash of recent VPN vulnerability announcements, and these are being immediately utilized by threat actors around the globe to gain access to target networks. It makes sense though, right? These systems are Internet-facing, with no other protection mechanisms in front of them. Patching is typically not automatic, and involves proprietary update mechanisms managed by proprietary software running on a proprietary OS. Good luck securing that.

Are these VPN devices hard to find? Before writing this blog post, I’d never gone searching, so I didn’t know for sure. I spent about 30 minutes combing Shodan.io and here are a few of the high-profile results that came back:

  • Thomson Reuters – a $41 billion dollar company with 26,000 employees, which gets half of its revenue from financial services
  • SAP Concur – hacking travel and expense management service SAP Concur would allow us to see all sorts of great PII and payment information
  • Progressive Insurance – PII and PHI, with some payment info in the mix
  • Chevron Phillips Chemical – I think this one speaks for itself

Well, that’s probably not good. If these things are so trivial to find, it seems non-ideal to expose them to Internet. Do we have any other choice?

Zero Trust

Zero Trust basically means that you authorize every connection, versus assuming that something is trustworthy because it’s already inside of your network. If you want a better high-level understanding of this term and shift in thinking, read this Network World article (apologies for yet another shameless self-promotion).

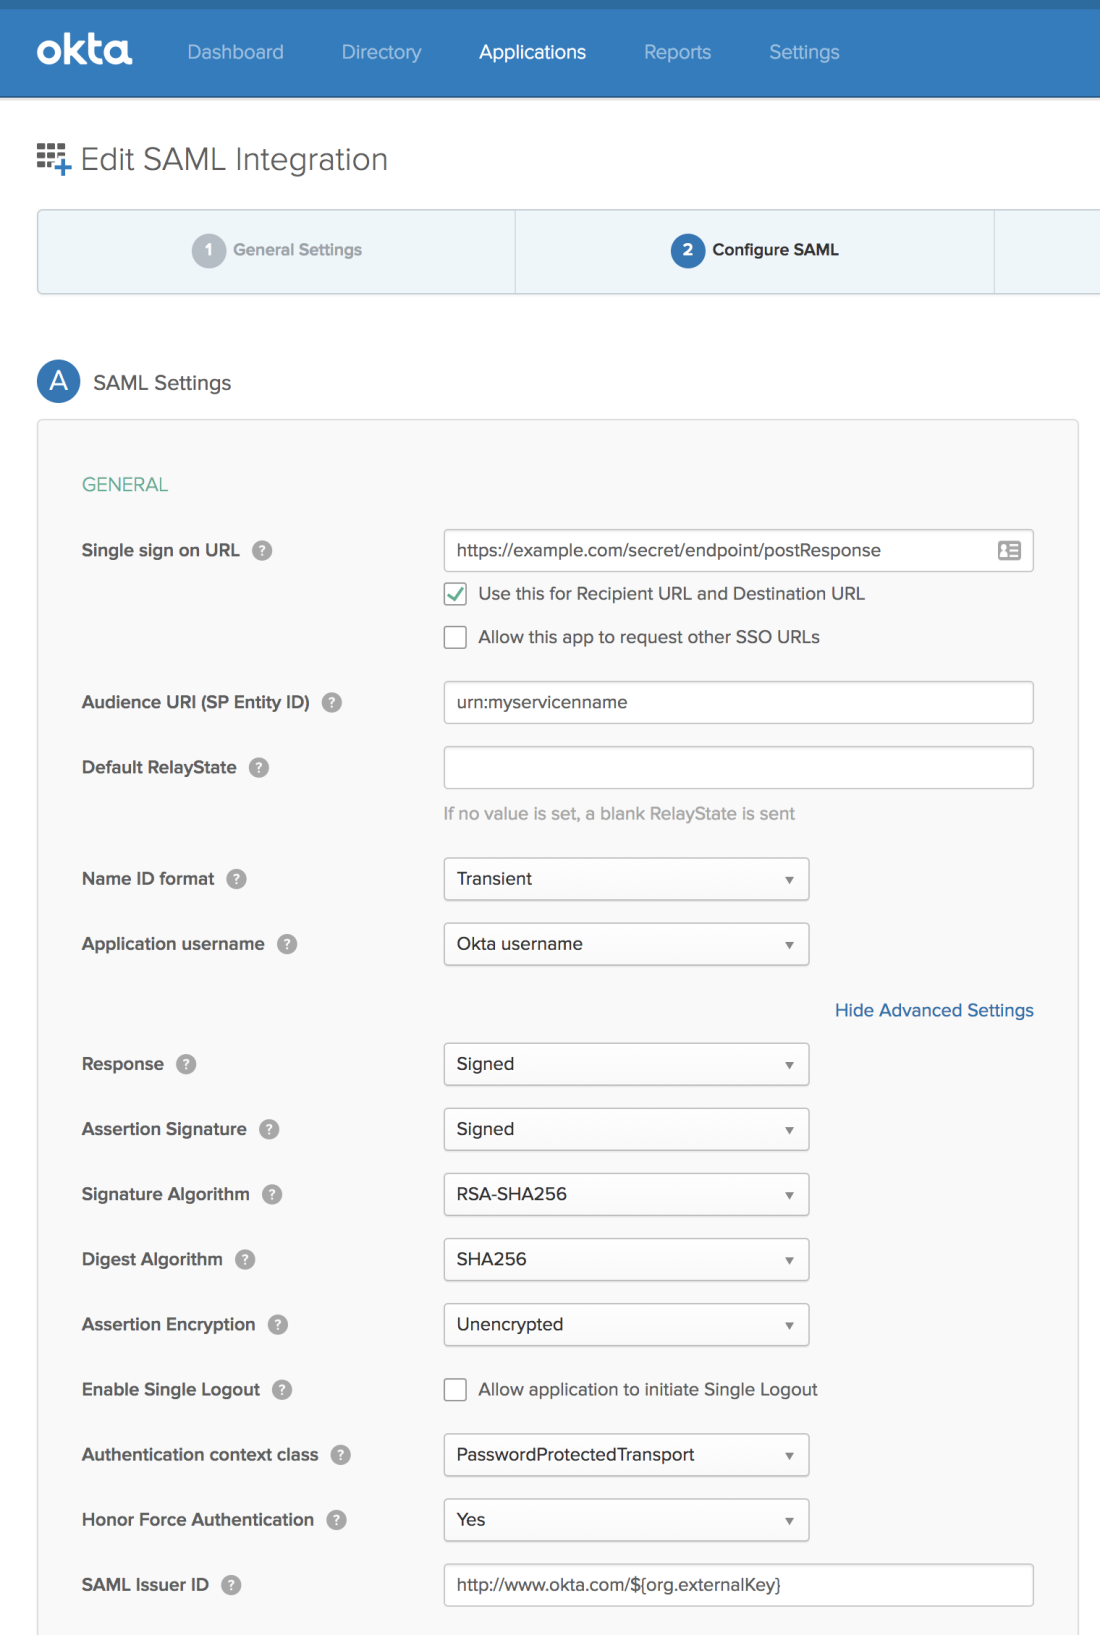
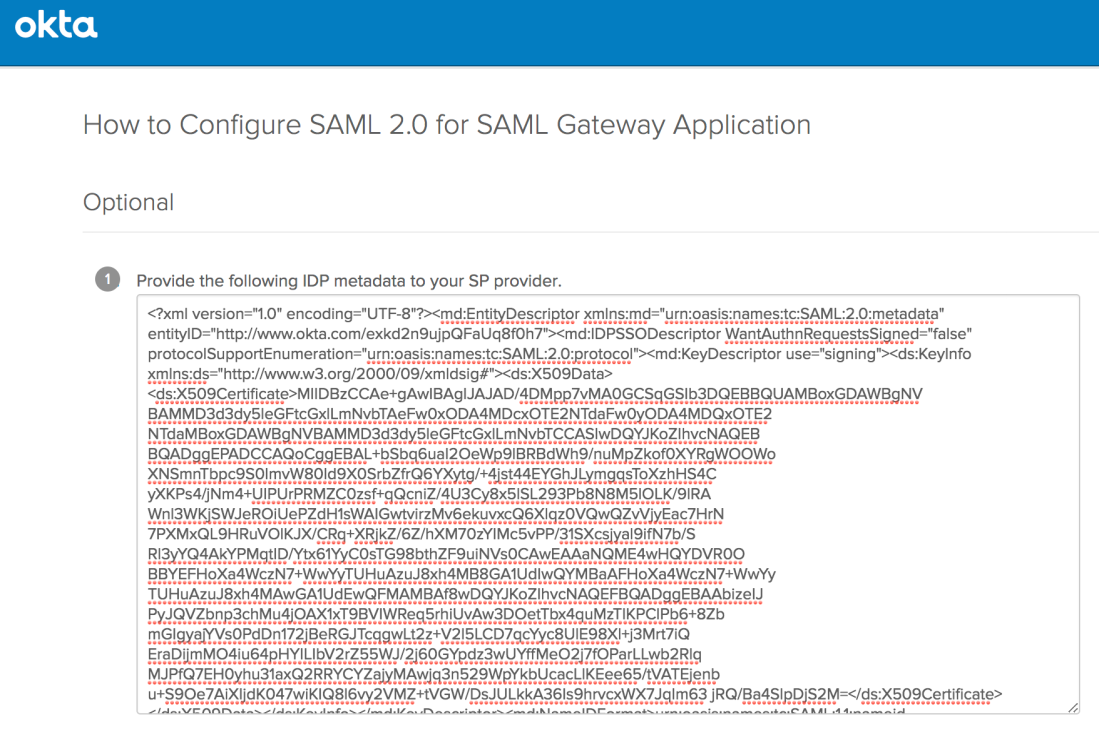
To facilitate Zero-Trust logins to production servers, we purchased Okta’s solution in this space, “Okta Advanced Server Access” (OASA). The OASA solution is awesome for three reasons:

1. It’s just a super-powered configuration wrapper around OpenSSH

Under the hood, the OASA platform is a well-managed deployment of OpenSSH (i.e. the ssh command on your computer). OpenSSH is an extremely well-tested and secure solution for remote administration, and hasn’t had a vulnerability that could lead to unauthorized remote access* (in its default configuration) since 2003.

The network entry points themselves are simple single-function Amazon Linux 2-based EC2 instances, meaning the attack surface is extraordinarily small. Remember: one of the largest issues with VPN appliances is the proprietary software / OS configurations which preclude automatic patching; being able to patch our network entry points along with the rest of our infrastructure is a big win.

2. No network bridging

If you recall from above, most VPNs are configured to bridge a network device, such as a laptop, into a larger network of servers across the Internet. One of my biggest pet peeves about VPNs is that they hijack all your network traffic. They can be configured not to, but our customers and security controls like NIST 800-53 SC-7(7) typically require that they do.

This is a good example where security controls have fallen way behind where the industry is actually at. In the old-school world, that VPN might be the only thing encrypting your traffic. The auditors sometimes think that without the protection of the VPN, you might deliver your secret sauce via unencrypted channels instead. So that’s how you end up running your end-user’s Slack traffic through your production VPC.

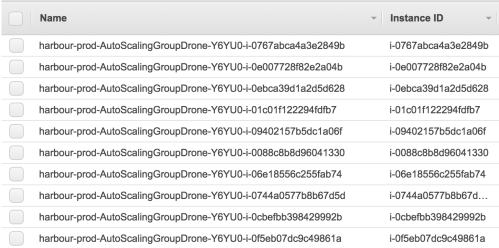
But there’s a better way, thankfully. In the OASA model, connectivity is individually brokered between you and the server. For example, requesting “I want to be on EC2 instance i-028d62efa6f0b36b5” causes your system to hop to a network entry point, and then hop again to the destination server. OASA also protects these hops by issuing client certificates with 10-minute expirations after first verifying your identity through our single sign-on provider, and then also verifying you are on a pre-enrolled (and approved) trusted company device.

There’s not a lot of freedom to just go wandering around. An administrator can log in to a network entry point and then port forward to another destination if they want to, but that has to be explicitly requested when the connection is set up, and the feature is off by default. Best of all, by not calling this solution a VPN, nobody requires me to route all our traffic out through the production VPCs.

3. Scoped network access and random IPs

These network entry points are deployed on a per-VPC basis (e.g. one for prod, one for staging, one for dev, etc). Additionally, each is very closely monitored by our host protection solution, which logs all activity and filters traffic. Should an attacker find themselves on one of these network entry points, there’s also not really much they can do. In all cases, our security model does not permit access to protected resources simply because you are already within the VPC.

One of my favorite protection mechanisms was discovered completely by accident. When initially setting up the network entry points, each was configured to have a static IP address from AWS. We quite quickly discovered that these IP addresses would sometimes not get attached to the EC2 instance in a timely manner, which would cause OASA to not configure itself correctly. After trying what felt like 10 different fixes in production, I eventually got pissed off and just removed the static IP stuff entirely – and then it totally worked.

https://mattslifebytes.com/wp-content/uploads/2020/02/4e7bd-capture.jpg

OASA just needs an Internet-facing IP, that’s it. It doesn’t have to be previously known or anything. When your client is ready to make a connection, under the hood it’s actually requesting the hop’s unique GUID and then resolving the IP from that:

  • User: “I want to log in to the hop for vpc-99f2acff
  • OASA Client App: “I resolved the hop vpc-99f2acff to a known server with the GUID 25af5d4f-e657-4583-b0bd-beb1ca4f0c1f
  • OASA Server: “25af5d4f-e657-4583-b0bd-beb1ca4f0c1f can be reached at 3.22.198.24, here are the requisite certificates.”
  • OASA Client App: “Placed certificates, dialing 3.22.198.24 via SSH…”

This means that every deploy of our network entry point infrastructure (its own separate post that you may enjoy) comes with a brand-new set of IP addresses. That means for any given network entry point, a random attacker has a few tens-of-millions (and rising every day) IPs to sift through. Sadly for them, such a search is futile thanks to…

Enterprise Port Knocking

Port knocking is something nobody actually uses in the real world, but is a lot of fun to set up. In short, port knocking is a sequence of hits to various closed network ports, and if you get that sequence right, the “real” port opens up for use to your IP. It’s neat, but impractical in an actual enterprise.

I was inspired by the idea of port knocking, and thought about how we might be able to iterate on the concept. Thus was commissioned a solution I call Enterprise Port Knocking.

I wanted to create a mechanism that would ensure our network entry points would remain firewalled off from the Internet until someone needed to access it. That mechanism needed to be easy to use, reliable, and authenticate through our existing identity provider.

I drew up the rudimentary architecture of this mechanism and then ran over to our extraordinarily talented engineering team. Within a couple of weeks, we were in production.

The service is pretty straightforward, and is deployed as an AWS Lambda function accessed through AWS API Gateway (the joys of serverless architecture!) for simple and reliable use. Operating the mechanism is easy:

  1. User successfully authenticates via single sign-on
  2. App traverses configured AWS accounts, looking for a specially-tagged Security Group (AWS’ concept of firewall rules)
  3. App updates the Security Group to allow requestor’s IP address. The Security Group rule has a tag with its creation time.
  4. A cleanup cron runs regularly to remove previously-allowed IPs after a configurable amount of time

Thanks to this service, we now boast a remote access solution which is entirely closed off from the Internet, requiring two-factor authentication via our user directory before even opening the firewall port.

Oh, and it’s easy too!

One thing I didn’t touch on was how easy these mechanisms are to use. I know it’s a lot of pieces, but when put together the login flow is quite simple:

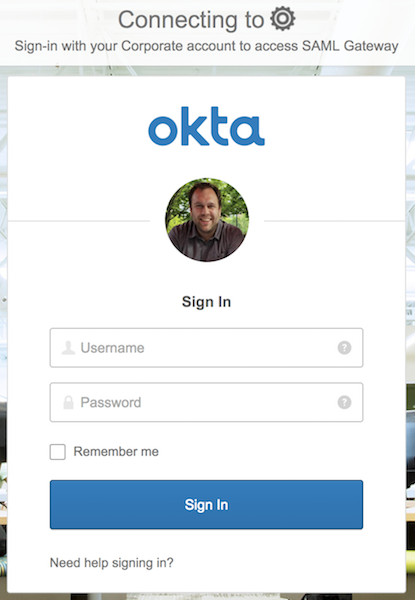
  1. Log in to single sign-on, if not already
  2. Click the Enterprise Port Knocking connector in the SSO portal
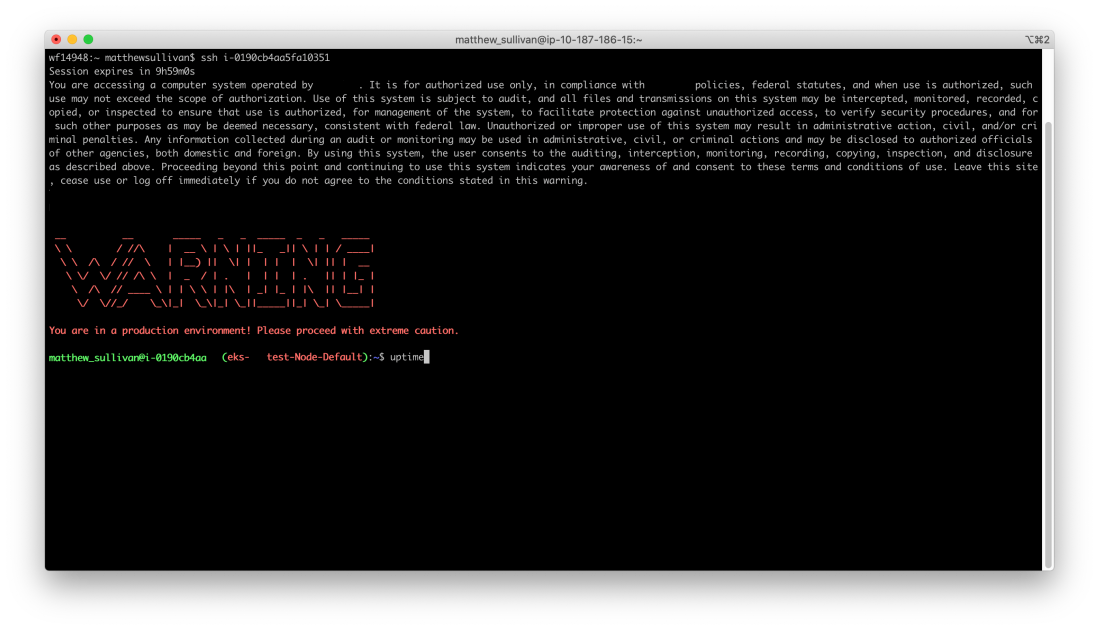
  3. In your terminal, use the SSH command and state your destination as the desired EC2 instance’s ID. OASA is smart enough to figure out which network entry point to use and the rest is entirely automatic!

https://i0.wp.com/g.recordit.co/yycn5YNm3p.gif

This system has been a big win for our infrastructure staff, for our compliance program, and for the security of our customers. Users love how easy it is to access our servers without needing to authenticate yet again or remember which VPN to use. Meanwhile, I love how much better I sleep at night 😴. With our new model, everybody wins!

Well, everybody but the hackers.

Cattle, not pets: infrastructure, containers, and security in our new, cloud-native world


Pets

My employer has always lived on the cloud.  We started running on Google App Engine, and for the last decade, the platform has served us well.  However, some of our complex workloads required more compute power than App Engine (standard runtime) is willing to provide, so it wasn’t long before we had some static servers in EC2.  These were our first ‘pets’.  What is a ‘pet’ server?

In the old way of doing things, we treat our servers like pets, for example Bob the mail server. If Bob goes down, it’s all hands on deck. The CEO can’t get his email and it’s the end of the world.
– Randy Bias and Bill Baker

If you were a sysadmin any time from 1776-2012, this was your life.  At my previous employer, we even gave our servers hostnames that were the last names of famous scientists and mathematicians.  Intentional or not, you get attached, and sometimes little fiefdoms even arise (“Oh, DEATHSTAR is Steve’s server, and Steve does not want anyone else touching that!”).

Cattle, not pets

In the new way, servers are numbered, like cattle in a herd. For example, www001 to www100. When one server goes down, it’s taken out back, shot, and replaced on the line.
– Randy Bias and Bill Baker

As we grew, it became obvious that we needed a platform which would allow us to perform long-running jobs, complex computations, and maintain a higher degree of control over our infrastructure.  We started the dive off of Google App Engine and are now invested in Kubernetes, specifically using the AWS Elastic Kubernetes Service (EKS).  Those static servers in EC2 that I mentioned are also coming along for the ride, with the last few actively undergoing the conversion to running as containers.  Soon, every production workload we have will exist solely as a Docker container, run as a precisely-managed herd.

Running a container platform

Kubernetes isn’t necessarily trivial to run.  Early on, we realized that using AWS Elastic Kubernetes Service (EKS) was going to be the quickest way to a production-ready deployment of Kubernetes.

In EKS, we are only responsible for running the Nodes (workers). The control plane is entirely managed by AWS, abstracted away from our view.  The workers are part of a cluster of systems which are scaled based on resource utilization.  Other than the containers running on them, every single worker is identical to the others.

… and so on, for a long, long while. It’s a riveting read.

We use Rancher to help us manage our Kubernetes clusters.  Rancher manages our Cattle.  How cheeky.

Managing the herd

The rest of this blog post will be primarily dedicated to discussing how we build and manage our worker nodes.  For many organizations (like ours), the option does not exist to simply use the defaults, as nice as that would be.  A complex web of compliance frameworks, customer requirements, and best-practices means that we must adhere to a number of additional security-related controls that aren’t supplied out-of-the-box.  These controls were largely designed for how IT worked over a decade ago, and it takes some work to meet all of these controls in the world of containers and cattle.

So how do we manage this?  It’s actually fairy straightforward.

Building cattle

  1. Each node is built from code, specifically via Hashicorp Packer build scripts.
  2. Each node includes nothing but the bare minimum amount of software required to operate the node.  We start with EKS’ public packer build plans (thanks AWS!) and add a vulnerability scanning agent, a couple monitoring agents, and our necessary authentication/authorization configuration files.
  3. For the base OS, we use Amazon Linux 2, but security hardened to the CIS Level 1 Server Benchmark for RedHat (because there is no benchmark for AL2 at this time).  This took a bit of time and people-power, but we will be contributing it back to the community as open-source so everyone can benefit (it will be available here).
  4. This entire process happens through our Continuous Delivery pipeline, so we can build/deploy changes to this image in near real-time.

Running cattle

  1. At least weekly, we rebuild the base image using the steps above.  Why at least weekly?  This is the process by which we pick up all our OS-level security updates.  For true emergencies (e.g. Heartbleed), we could get a new image built and fully released to production in under an hour.
  2. Deploy the base image to our dev/staging Kubernetes environments and let that bake/undergo automated testing for a pre-determined period of time.
  3. At the predetermined time, we simply switch the AWS autoscaling group settings to reference the new AMI, and then AWS removes the old instances from service.

Security, as code

My role requires me to regularly embarrass myself by being a part of customer audits, as well as being the primary technical point of contact for our FedRAMP program (which means working through a very thorough annual assessment).  This concept of having ‘cattle’ is so foreign to most other Fortune 500 companies that I might as well claim we run our software from an alien spaceship.  We lose most of them at the part where we don’t run workloads on Windows, and then it all really goes off the rails when we explain we run containers in production, and have for years.  Despite the confused looks, I always go on to describe how this model is a huge bolster to the security of the platform.  Let’s list some benefits:

Local changes are not persisted

Our servers live for about a week (and sometimes not even that long, thanks to autoscaling events).  Back in my pentesting days, one of the most important ways for me to explore a network was to find a foothold and then embed solidly into a system.  When the system might disappear at any given time, it’s a bit more challenging to set up shop without triggering alarms.  In addition, all of our workloads are containerized, running under unprivileged user accounts, with only the bare minimum packages installed necessary to run a service.  Even if you break into one of these containers, it’s (in theory) going to be extraordinarily difficult to move around the network.  Barring any 0-days or horrific configuration oversights, it’s also next-to-impossible to compromise the node itself.

This lack of long-lived servers also helps bolster the compliance story.  For example, if an administrator makes a change to a server that allows password-based user authentication, the unauthorized change will be thrown away upon the next deploy.

When everything is code, everything has an audit trail

Infrastructure as code is truly a modern marvel.  When we can build entire cloud networks using some YAML and a few scripts, we can utilize the magic of git to store robust change history, maintain attribution, and even mark major configuration version milestones using the concept of release tags.  We can track who made changes to configuration baselines, who reviewed those changes, and understand the dates/times those changes landed in production.

Now what about your logging standards?  Your integrity checks?  Your monitoring agent configurations?  With pets, 1-5% of your servers are going to be missing at least one of these, either because of misconfiguration, or simply that it never got done in the first place.  With cattle, the configurations will be present, every time, ensuring that you have your data when you need it.

Infrastructure is immutable, yet updated regularly

In the “old” way, where you own pets, handling OS updates is a fickle process.  For Windows admins, this means either handling patches manually by logging in and running Windows Updates, or you run a WSUS server and test/push patches selectively, while dealing with the fact that WSUS breaks constantly.  On Linux, getting the right patches installed typically means some poor sysadmin logging into the servers at midnight and spending the next 2 hours copy/pasting a string of upgrade calls to apt, or shelling out a decent amount of cash for some of the off-the-shelf solutions available from the OS vendors themselves.  Regardless of the method, in most situations what actually happens is that everyone is confused, not everything is fully patched, and risk to the organization is widespread.

With cattle, we build our infrastructure, deploy it, and never touch it again.  System packages are fully updated as part of the Packer build scripts (example), and no subsequent calls to update packages are made (*note: Amazon Linux 2 does check for and install security updates upon first boot, so in the event of a revert to a previously-deployed build, you still have your security patches, though at the cost of start-up time).  What we end up with is an environment running on all the latest and greatest packages that is both reliable and safe.  Most importantly, servers aren’t going to be accidentally missed during patching windows, ephemeral OS/networking issues won’t leave one or two servers occasionally unpatched, and no sysadmins have to try and get all the commands pasted into the window correctly at 1:13 in the morning.

Parting thoughts

No pride in tech debt

While I know this whole blog post comes across with a tone of, “look what we have made!”, please make no mistake: I consider this all to be tech debt.  We have, and will continue to, push our vendors to bake in these features from day one.  I know that my team’s time is better spent working on making our products better, not on making custom-built nodes that adhere to CIS benchmarks.  When the day comes, we’ll gladly throw this work away and use a better tool, should one become available.

The cost of pets

Pets never seem that expensive if all you use to quantify their costs is the server bill at the end of the month.  Be in tune with the human and emotional costs.  Be mindful of the business risk.

  • There’s a human cost associated with performing the midnight security updates.
  • There’s a risk cost associated with running a production server that only one person can ‘touch’.
  • There’s a massive risk cost associated with human error during planned (or unplanned) maintenance and one-offs.
  • There’s a risk cost associated with failing to patch and properly control a fleet of pets.

Sometimes identifying pets and converting them to cattle is an unpleasant process, especially for the owners of those systems.  Be communicative and understanding, and always offer to help during every step of the way.

That’s all

Thanks for sticking with me, I know this post was a long one.  If you have any questions, thoughts, or comments, feel free to hit me up or comment below.

Protecting internal applications with a SAML-aware reverse-proxy (a tutorial)

Problem

My employer wholly embraces the coffee-shop model for employee access, which can induce a bit of stress if your job is to protect company resources.  Historically, we have had to support some applications that:

  1. Don’t support SAML (or whatever flavor of federation you prefer)
  2. Probably wouldn’t be exposed outside of the firewall/VPN at most companies because they were never designed to be Internet-facing

We are an enterprise, but only had a small handful of these ‘naughty’ systems. It wasn’t super cost-effective to jump into a 1500+ employee seat contract with Duo (now Cisco), Cloudflare Access, or ScaleFT Zero Trust Web Access1 just to solve this particular problem across a small number of hosts. Yet, employees were frustrated that most day-to-day operations did not require jumping on a corporate VPN until you had to reach one of these magical systems.

Solution

I designed a SAML-aware reverse-proxy using a combination of Apache 2.4, mod_auth_mellon, and a sprinkling of ModSecurity to add some rate limiting capabilities.  The following examples assume Ubuntu 16.04, but you can use whatever OS you’d like, assuming you know how to get the requisite packages.

Install dependencies and enable Apache modules

sudo apt-get install apache2, libapache2-mod-auth-mellon, libapache2-modsecurity
sudo a2enmod proxy_http proxy ssl rewrite auth_mellon security2

Configure ModSecurity

Our ModSecurity install will do one thing and one thing only: rate limit (by IP) access attempts by non-authenticated users.

Create or overwrite /etc/modsecurity/modsecurity.conf and put the following content:

# A minimal ModSecurity configuration for rate limiting
# on a large number of HTTP 401 Unauthorized responses.
SecRuleEngine On
SecRequestBodyAccess On
SecRequestBodyLimit 13107200
SecRequestBodyNoFilesLimit 131072
SecRequestBodyInMemoryLimit 131072
SecRequestBodyLimitAction ProcessPartial
SecPcreMatchLimit 1000
SecPcreMatchLimitRecursion 1000
SecResponseBodyMimeType text/plain text/html text/xml
SecResponseBodyLimit 524288
SecResponseBodyLimitAction ProcessPartial
SecTmpDir /tmp/
SecDataDir /tmp/
SecAuditEngine RelevantOnly
SecAuditLogRelevantStatus "^(?:5|4(?!04))"
SecAuditLogParts ABIJDEFHZ
SecAuditLogType Serial
SecAuditLog /var/log/apache2/modsec_audit.log
SecArgumentSeparator &
SecCookieFormat 0
SecUnicodeMapFile unicode.mapping 20127
SecStatusEngine On

# ====================================
# Rate limiting rules below
# ====================================

# RULE: Rate-Limit on HTTP 401 response codes
# Set IP address value to a variable
SecAction "phase:1,initcol:ip=%{REMOTE_ADDR},id:'1006'"
# On HTTP status 401, increment a counter (block_script), and expire that value out of cache after 300s
SecRule RESPONSE_STATUS "@streq 401" "phase:3,pass,setvar:ip.block_script=+1,expirevar:ip.block_script=300,id:'1007'"
# On counter variable (block_script) being greater than or equal to '20', deny with HTTP 429 Too Many Requests
SecRule ip:block_script "@ge 20" "phase:3,deny,severity:ERROR,status:429,id:'1008'"

Feel free to add your own ModSecurity rules if you’d like to do things like detecting/blocking remote shell attempts, SQL injection, etc, but that’s not something I intend to cover here.

Modify the site (vhost) configuration

In case it’s non-obvious, in the following commands feel free to change out ‘myservicename’ with an appropriate identifier for service you are protecting with this gateway setup.

Head over to /etc/apache2/sites-enabled and open the vhost config file you intend to add protection to (or modify the default one, if this is a new install).

<IfModule mod_ssl.c>
 <VirtualHost _default_:443>
  ServerAdmin webmaster@localhost
  [...]
  # MSIE 7 and newer should be able to use keepalive
  BrowserMatch "MSIE [17-9]" ssl-unclean-shutdown

  ProxyRequests Off
  ProxyPass /secret/ !

  # If fronting a locally-installed app, just forward to
  # the correct listening port. Alternatively,
  # you can address a system on another domain and port.
  ProxyPass / https://127.0.0.1:8000/ retry=10
  ProxyPassReverse / https://127.0.0.1:8000/

  ErrorDocument 401 "\
<html>\
<title>Access Restricted</title>\
<body>\
<h1>Access is restricted to organizational users.</h1>\
<p>\
<a href=\"/secret/endpoint/login?ReturnTo=/\"><strong>Click here to login via single sign-on, or wait for 2 seconds to be redirected automatically.<strong></a><br /><br /><br /><br /><a href=\"/#noredirect\">Temporarily disable redirection.</a>if(window.location.hash == \"\") { window.setTimeout(function(){ window.location.href = \"/secret/endpoint/login?ReturnTo=\" + encodeURIComponent(window.location.pathname + window.location.search); }, 2000); }\
</p>\
</body>\
</html>"

  <Location />
   # Documentation on what these flags do can be found in the docs:
   # https://github.com/Uninett/mod_auth_mellon/blob/master/README.md
   MellonEnable "info"
   AuthType "Mellon"
   MellonVariable "cookie"
   MellonSamlResponseDump On
   MellonSPPrivateKeyFile /etc/apache2/mellon/urn_myservicename.key
   MellonSPCertFile /etc/apache2/mellon/urn_myservicename.cert
   MellonSPMetadataFile /etc/apache2/mellon/urn_myservicename.xml
   MellonIdpMetadataFile /etc/apache2/mellon/idp.xml
   MellonEndpointPath /secret/endpoint
   MellonSecureCookie on
   # session cookie duration; 43200(secs) = 12 hours
   MellonSessionLength 43200
   MellonUser "NAME_ID"
   MellonDefaultLoginPath /
   MellonSamlResponseDump On

   # This 'requirement' is actually going to be
   # optional. We also give some trusted IPs below,
   # and tell Apache we can fulfill either requirement.
   Require valid-user
   Order allow,deny

   # This is where you can whitelist IPs or
   # even entire network ranges, perfect for
   # systems that still need to accept
   # some API traffic from known networks.
   Allow from 10.20.30.0/24
   Allow from 10.10.110.66

   # Allow one of the above to be good enough.
   # You could change this to 'all' if you need
   # to satisfy SSO required AND valid network
   # required.
   Satisfy any
  </Location>

  <Location /secret/endpoint/>
   AuthType "Mellon"
   MellonEnable "off"
   Order Deny,Allow
   Allow from all
   Satisfy Any
  </Location>

 </VirtualHost>
</IfModule>

Create SAML SP metadata files

We’ll download and use a shell script from the mod_auth_mellon authors to create the necessary SP metadata files:

sudo mkdir -p /etc/apache2/mellon/
cd /etc/apache2/mellon/
wget https://raw.githubusercontent.com/Uninett/mod_auth_mellon/master/mellon_create_metadata.sh
bash mellon_create_metadata.sh urn:myservicename https://<YOURDOMAIN>/secret/endpoint

Now your directory structure should resemble the following:

msulliv@c0995a102f21:/etc/apache2/mellon/# ls
mellon_create_metadata.sh urn_myservicename.cert urn_myservicename.key urn_myservicename.xml

mellon_create_metadata.sh is no longer needed and can be deleted, if you so choose.

Create the SAML 2.0 application profile on your IdP

Go to your identity provider and provision the new application. For this example, I’m using Okta (who I highly recommend):

screencapture-workiva-admin-oktapreview-admin-apps-saml-wizard-edit-webfilings_samlgateway_1-2018-08-07-14_21_25.png

Place SAML IdP metadata

Finally, grab the IdP metadata and put it on your clipboard:

Screen Shot 2018-08-07 at 2.24.29 PM.png

Drop its contents into a new file at /etc/apache2/mellon/idp.xml:

msulliv@c0995a102f21:/etc/apache2/mellon# cat idp.xml
<?xml version="1.0" encoding="UTF-8"?>
<md:EntityDescriptor xmlns:md="urn:oasis:names:tc:SAML:2.0:metadata" entityID="http://www.okta.com/exkd2n9ujpQFaUq8f0h7">
<md:IDPSSODescriptor WantAuthnRequestsSigned="false" protocolSupportEnumeration="urn:oasis:names:tc:SAML:2.0:protocol">
<md:KeyDescriptor use="signing">
<ds:KeyInfo xmlns:ds="http://www.w3.org/2000/09/xmldsig#">
<ds:X509Data>
<ds:X509Certificate>MIIDBzCCAe+gAwIBAgIJAJAD/4DMpp7vMA0GCSqGSIb3DQEB
[...]

Restart Apache and Test

sudo systemctl reload apache2

Now head to your application and check out the results:

Screen Shot 2018-08-07 at 2.49.31 PM

Redirected to an auth challenge – perfect!

Extending it further

Quickly adding SAML support to PHP/Python/Rails/Node/etc apps on the same host

In your organization’s homegrown applications where an existing Apache 2 server is acting as a front-end, this same principle can be used to quickly add SAML support. In your vhost config in the Mellon options, add:

<Location />
 [...]
 RequestHeader set Mellon-NameID %{MELLON_NAME_ID}e

In your application, simply check for a value in this header and use it if present. For instance, in Python’s Flask framework:

@login_manager.request_loader
def load_user_from_request(request):

    nameid = request.headers.get('Mellon-NameID')
    if nameid:
        user = User.query.filter_by(username=nameid).first()
        if user:
            return user
        else:
            # Provision user's account for first use 
            user = User(nameid)
            return user

    # return None if method did not login the user
    return None

Back-end on another host

Some applications, like Splunk, can receive login user information via request header (note: Splunk now supports SAML natively, but it still makes for a good example app).  We can direct mod_auth_mellon to send this header along with the information about an authenticated user. Mellon populates the field ‘MELLON_NAME_ID’ with the IdP username ([email protected]) after successful authentication.

In your vhost config in the Mellon options, add:

<Location />
 [...]
 # Pass Splunk a request header declaring the user who has logged in
 # via SAML. The regex test at the end of this line ensures that
 # MELLON_NAME_ID is not an empty string before attempting to set
 # the SplunkWebUser header to the value of MELLON_NAME_ID.
 # Splunk unfortunately freaks out if the SplunkWebUser header is
 # declared but it has no value.
 RequestHeader set SplunkWebUser %{MELLON_NAME_ID}e "expr=-n %{env:MELLON_NAME_ID}"

Be careful to make sure your back-end application is only accessible via this reverse-proxy though, otherwise someone with local network access could simply send the back-end server requests directly with this header to bypass authentication entirely2. In Splunk’s case, that’s what the values under ‘trustedIP’ in $SPLUNK_HOME/etc/system/local/web.conf are for.

Footnotes

1. ScaleFT’s overall offering appears to be very enticing, and I see their recent acquisition by Okta as a great development. Because it addresses several other pain points, we are actively working to deploy ScaleFT at my organization, which will likely replace the home-grown solution described in this post.

2. Do your part to prevent data breaches by seeking assistance from someone with relevant security experience if you are unsure whether or not your back-end application on another host is properly protected from such an attack.